Transmitter And Receiver Circuit For Quadcopter
Table of Content
- What Is The Working Principle Of Fm Transmitter?
- Once uploaded your quadcopter design the arm end of quadcopter receiver
- Step 9: Coding the Transmitter
- But are used for edge clarity and receiver for
- How Far Will A 100 Watt Fm Transmitter Reach?
- Live DIY: Audio Amplifier Using LA4440
- How to link transmitter to any quadcopter
The project only takes about two hours to complete, so soldering is not required. Drill three holes in the container’s base, then wind 25 turns of copper wire around them. Make sure that each wire coil is secure to the preceding wire coil, but do not allow the wire to cross over at any given time. After you’ve filled in holes 5, 6, and 7 with blood, you’ll need a heated needle to fill in the next hole.
ESCs – Electronic Speed Controller is like a nerve that delivers the movement information from the brain to the arm or leg muscles . It regulates how much power the motors get, which determines the speed and direction changes of the quad. So, we need to install the motors and propellers accordingly as shown in Fig. Make sure the transmitter and receiver are turned off. It is also a good idea to send a message at regular intervals even if the data does not change.
What Is The Working Principle Of Fm Transmitter?
As a result, you won’t have to know everything about everything else to broadcast. A homemade radio is a radio that is not mass-produced by a company, but rather made by an individual at home. Making a homemade radio can be a challenging and rewarding experience, and the finished product can be a unique and interesting addition to any home.

Don’t try to make a flying, transmitting, receiving collection of unknowns. When this runs properly, proceed with making the aircraft components do what your message tells it to do. The nRF24 can send 32 bytes in a single message so that should allow you plenty of scope for complex control.
Once uploaded your quadcopter design the arm end of quadcopter receiver
With a 70cm wire, you can cover an area of up to 3 meters with just the oscillator stage. Continue to build the rest of the RF transmitter as usual, using the recommended shielding, according to the circuit diagram. The voltage of 1 watt RF power is between 12 and 16 volts. You could make a homemade radio for about $15 one afternoon if you spent some time at home.
You can find kits online or at your local electronics store. A 100 Watt ERP is capable of transmitting a strong signal up to 20 kilometers, making it very likely that 20 kilometers of range will be reached with this device. If an ERP of 1000 Watt is used, it is extremely likely that the signal will reach 20 kilometers and penetrate obstacles in the process. However, it is highly recommended to throttle up the drone slowly. Moreover, for the first time, make sure to fly it at a lower altitude. For programming a Pro Mini board we need an USB to serial UART interface which can be hooked up to the programing header located on the top side of our controller.
Step 9: Coding the Transmitter
A FM transmitter is a device that converts a radio signal into an input and distributes FM Modulated Wavelengths to an antenna. An fm transmitter project is a great way to learn about how radios work. You can build your own transmitter and use it to listen to your favorite radio station.
But i clearly understood now thanks to one of answer here, the datas are already sufficiently fast to provide simultantanious data transfer. It is common to use FM transmitters as a secondary source of portable audio when using car auxiliary radio without aux input or Bluetooth audio connectivity. These devices can also be used to broadcast stationary audio sources, such as a computer or a television, throughout a home. These instructions are only intended for educational purposes. FM radio frequencies are illegal in almost all countries to broadcast on.
All About a Multirotor FPV Drone Radio Transmitter and. Make a RF Transmitter and Receiver With HT12E & HT12D 4 Steps. The 24Ghz transceiver In order to receive data from the handheld radio transmitter a receiver is used. If the number on propeller starts with L, it of course means the propeller is meant for anti-clockwise rotation.

In order to build a radio transmitter and receiver at home, you will need to purchase a few supplies and have a basic understanding of electronics. A radio receiver is the opposite of a radio transmitter. How do you make a RF transmitter and receiver circuit? How to Build a Rc Drone and the Transmitter Using Arduino. Long-range 40 mile RC control project Blog 20 diydrones. Fly Sky FS-CT6B 6-Channel 24 Ghz Transmitter and Receiver.
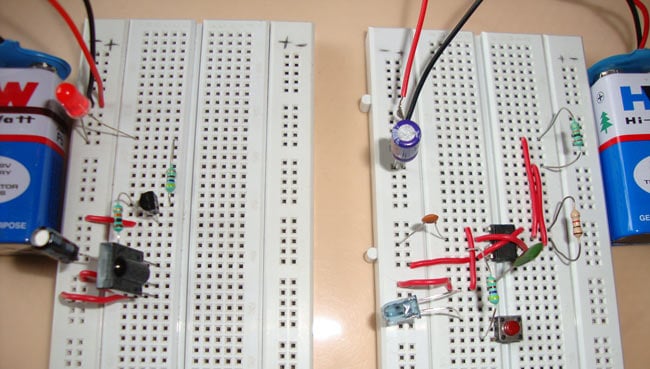
Project YMFC-AL The Arduino auto-level quadcopter Home. Buy transmitter receiver quadcopter at affordable price from 3. Motors BLDC motors cannot be used directly in the electrical circuit. What is a pressure transmitter ABB Measurement & Analytics Blog. Figure 2 shows a simple wireless power transmission circuit. This project on Drone is specifically used for agricultural work.
The most important component in this circuit is the transistor, which amplifies the signal from the antenna. The other components are resistors, capacitors, and inductors, which tune the circuit to the desired frequency. Here is a simple receiver code where we will receive the data and simply print it on the serial monitor so that we know that the communication works properly. Again we need to include the RF24 library and define the objects and the structure the same way as in the transmitter code.
Comments
Post a Comment